I told myself I wouldn't try and do the new Project Quilting challenge - just too many things that needed to be done this past week! But I read about the current challenge last Sunday and tried not to think about it too much. By Monday I had the project that I ended up doing firmly planted in my mind and I just couldn't ignore it! I just knew I had to make a quilt with this little sketch/doodle whether or not I made it in time to submit it to Project Quilting. When I was in school I always used to draw in the margins of my notebooks as I sat in class. If I just had regular lined paper I would lightly draw in vertical lines too, then draw the framework you can see on the right side of the scan below, then shade in with pen or pencil.
The challenge was to choose at least 3 office supplies and either use them in your project or let them be the inspiration. I chose 2 obvious ones from the sketch above - graph paper and colored pencils. For my 3rd item I chose another favorite - binder clips! I just knew they'd be perfect for hanging up a small piece on the wall!
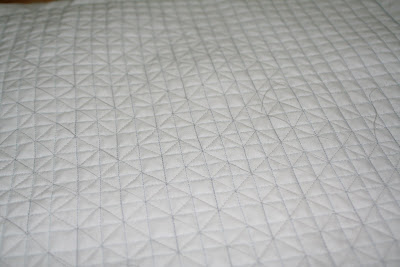
I finally got started on Wednesday. Using some white Kona cotton, my big ruler and a fabric marking pencil I drew little dots every 1/2" all over the fabric. I was planning for those little dots to be my guide when sewing out the graph paper grid. Once I got all done and sat down at the sewing machine I realized that was just not going to work. With a 2 year old climbing all over you as you are drawing out dots, accuracy drops. I ended up ignoring the dots I spent an hour drawing and just sewing using the presser foot as a guide. The dotty side became the back. :) This photo was taken Tuesday night.
The next step was to sketch/sew on the doodle! For this step I used a light grey thread. I wish I'd used a darker grey but no time to stop sewing and go to the store for darker thread. And here is what the quilt looked like with the doodle outline all sewn. (Taken Thursday night.) I doubled the size of the doodle on the grid too so it would be easier to see.
The grid and the outlining went pretty quickly. I had visions of uploading photos of my little quilt Friday evening, Saturday morning at the latest. WRONG!
To fill in all the outlines to mimic the shading I usually draw I decided I'd use colored thread and fill it in by straight stitching back and forth; close together for the darker shading and a bit farther apart for the lighter shade. I thought this would take a couple hours at most. So very wrong! I think it actually took about 10, mostly hours where I should have been sleeping! I worked from about 10pm - 2:30am the past two nights (but did the binding in there too) plus I got up early this morning to finish up. I'm exhausted but with the last two nights I was not about to miss today's submission deadline!
This is where I gave up Friday night.
I had all but the bright yellow and yellow-green done when I stopped last night (or dark-thirty this morning technically) but didn't think to take a photo.
I had originally planned an in-order rainbow arrangement, but since I didn't have a real orange I decided to shift everything a bit. Plus I'd rather have the focus be on the blues and greens.
It was such a relief this morning to get those final stitches in! And somehow I managed to finish just before I used up the 2nd full bobbin on grey thread! I used all grey in the bobbin for the outlining and coloring, so the back looks like I just colored it in with a regular pencil. (If you ignore all those loose threads I haven't taken care of yet.)
Here's the final finished quilt! I really do like how it turned out and I think the binder clip hangers are an extra fun touch. :) I'll either paint those thumbtacks to match the wall or use something else to hang the clips.
And here's another close look! This time, from the side.
I hope you like my little quilt too! I'd love to have your vote this week over at Project Quilting! Vote on the upper left side and be sure to leave a comment on the Office Store Challenge post to have a chance at winning a prize too!


Sarah! That is amazing!!!
ReplyDelete