Showing posts with label excitement. Show all posts

Sunday, December 18, 2011

Windy Days Quilt Feature!

I'm excited to share that my Windy Days pattern is being featured on Pink Chalk Studio's Countdown to Christmas today!


In case you are hopping over from Pink Chalk Studios or Moda Bake Shop, I wanted to point out these additional instructions in case you are using yardage for the background rather than 2 solid charm packs.

If you are looking for a little inspiration, head over to flickr to see some of the other Windy Days quilts that have been made! Such a variety! 

Monday, June 13, 2011

Two Popover Dresses!

Summer sewing is in full swing here! Last Sunday I whipped up these 2 adorable Oliver + S Popover Dresses!

One dress with a cute print and some leftover bias trim from the Windy Days quilt!


And another from a summery purple strawberry print and the same red dotty fabric I pulled out when I made my 1st Family Reunion Dress!


I had to add a bit more inside even, it's just so cute! :)


I can't believe it took me so long to try this pattern! It's super-quick and such a cute result!

My sewing spree isn't over, not even close! I have a few more fun projects in the works, plus I just bought fabric to sew my girls school uniforms for next year, so I have lots of sewing to do! But, 1st things 1st, it's time for the Family Reunion Dress Sew-Along! I'm so excited! Are you joining in?

blog.jpg

I'll be posting steps to help guide you along in following the already wonderful Oliver+S instructions every other day on Above All Fabric's blog! You can keep right up as I post the steps, or catch up later if you don't have all your supplies yet! As long as you submit a finished project image to the Family Reunion Sew-Along Flickr group by July 15th you'll have a chance to win a $20 gift certificate to Above All Fabric! 

Wednesday, May 18, 2011

Introducing my Windy Days Quilt pattern!

I'm so pleased to have a new "recipe" up at Moda Bake Shop today, my Windy Days Quilt!


If you've been a long-time reader of mine, you may recognize this design! It originated as a scrappy quilt for my little boy (and I sliced a bit of my fingertip off during construction)!


I wanted to share instructions here on how to use yardage for the solid pieces rather than the charms packs in case you want to use a color not available in precuts.

If you wish to use yardage for your "solid" rather than 2 charm packs, you will need 1 1/2 yards of fabric. You could certainly use a subtle print too!

The quilt needs a total of 45  4 1/2" background squares and 36 additional 5" squares that will be pieced with the prints.

To cut these out of the 1 1/2" yards of fabric, cut as follows:
  • 5 strips, selvage-to-selvage, 4 1/2" wide 
    • Cut strips into 4 1/2" squares (9 squares per strip) 
  • 4 strips, selvage-to-selvage, 5" wide 
    • Cut strips into 5" squares (8 squares per strip, you'll have a few leftover)
Lovely Melanie of Above All Fabric has created kits with a few different fabric options for Windy Days!  I didn't have enough fabric left over to add a border to my quilt, but I do love how it looked when I set the fabric out! So, the quilt kit includes fabric to add a border for your quilt!

Here are the other options in addition to Just Wing It (so far): Hullabaloo and Happier


I sure hope you enjoy this pattern as much as I do! :)

Tuesday, May 17, 2011

Introducing the Family Reunion Dress Sew-Along!

I wanted to show a few more photos of very latest project, the Oliver + S Family Reunion Dress and introduce the Family Reunion Dress Sew-Along on Above All Fabric's blog in June! (Grab this button and add it to your blog!) 

blog.jpg


For my sample dress, I chose the cute pink floral from Riley Blake's Sugar & Spice line!  


I added a teeny bit of bias trim created from red w/ white polka dots fabric fabric from my stash around the button tab. This photo is a bit blurry, but I just love the pintuck details!


I love all the buttons down the back too!


So…start thinking! I will have a post up soon at Above All Fabric's blog with fabric inspiration to help you shop for supplies your Family Reunion Dress! :)

I'm planning to make another right along with everyone else, so I have to pick some more fabric too!

Monday, May 16, 2011

Lots of catching up! Quilts and little clothes and a fun meeting!

It's been a while since I've posted here, so that means I have lots of photos to share!

I have not 1, not 2, but 3 quilts in the almost-done stage right now!

Two are baby quilts for friends about to head off to sweet little newborns as soon as I put the finishing touches on. Here is one of the quilt tops before quilting-- it is now backed with light blue Minkee. I made up the pattern when I was inspired by the fabric. I'll do a little write-up on it when I get photos of the finished quilt!


Somehow I've managed not to get a great photo of the other baby quilt top, but I love it! Here's an early process photo. It's Basic Grey Sultry, and I'm using a Moda Bake Shop recipe. I'll post finished photos of it when it's done too!


And here's a quilt just for me! :) It's Kate Spain's Central Park line, which I absolutely adore! (And have plans for a 2nd quilt with too!) This is a Sudoku kit! (Bad photo though! See the 2nd photo for true colors.) The solid I used for the sashing and border is Moda Bella Basics Stone.


And here is the back, which I love just as much as the front! I used a set of little 2 1/2" Central Park precuts that Kate Spain sent me after winning a Christmas giveaway on her blog.


I joined in a Pincushion Swap hosted by Cara Quilts (also host of Talkin' Tuesdays on Twitter!). This is what my swap parter recieved! It's a modified version of my Moda Bake Shop Log Cabin Baby Block tutorial, made smaller and scrappy.


I finally bought the Oliver + S Little Things To Sew book! I don't know why I waited so long! So many cute projects in it! Within a week of receiving the book, my oldest had already chosen the bias-trimmed apron and fabric for it for her costume to wear to Career Day at school (she was dressing up as an artist). I think it's as cute as can be!


Now this cute little shirt was supposed to be my little guy's Christmas outfit, but I only got it cut out before Christmas, not sewn. Then it just sat neglected. I finally sewed it up, had a horrid time with my machine (which is overdue for service) cooperating on the buttonholes, and once I got the buttonholes done was so frustrated I set it aside again. Finally I sewed the buttons on a week or so ago. It's the Oliver + S Sketchbook Shirt in a fun Sweetwater Pure argyle print.


I just wish I'd made it a size 3 instead of a size 2 so it would fit him longer!


Here is my very latest project, the Oliver + S Family Reunion Dress! The fabric is from Riley Blake's Sugar & Spice line, isn't is cute? You will be seeing a lot more of this dress in the coming weeks! :) I will be hosting a Family Reunion Dress sew-along on Above All Fabric's blog in June! Stay tuned for more details!!!


A few weeks ago Liesl Gibson of Oliver + S had a book signing appearance at a not-too-terribly-far-away (and super cute!) shop, Fancy Tiger, so I had to go! Since the kiddies were dressed in their O+S favorites, Liesl kindly posed for a photo with us. 


Sweet Trish Preston runs a weekly feature on her Two Peas in a Pod Designs blog called Monday Morning Inspirations and in April she featured me! :) Hop on over to read my little interview. Trish is so nice, and so full inspiration herself! And this summer you will be able to watch her on PBS in a new show called It's Sew Easy!


And last but not least, here's a little sneak peek! I will have a new Moda Bake Shop recipe debuting on Wednesday! Here's a pic from the photo shoot. :)

Thursday, March 24, 2011

Moda Bake Shop contest, an exciting magazine back cover & a sneak peek!

Have you heard about the Moda Bake Shop contest for March? Head over to the Contest page and download the Printer Friendly Version to read all the details!


Charm packs might be my very favorite precut! They are so inexpensive and you get a taste of the whole fabric line! Plus, there's a lot you can do with a 5" square!

Remember my Log Cabin Baby Block Recipe? You can make one with Charm Pack (and have some left over)!


If you've picked up the Perfect for Precuts magazine that's on newstands right now, be sure you flip it over and take a look at the back cover!


What's that in the top left corner? :) Lots of other great MBS projects and friendly faces too!


I'm currently putting up finishing touches an on new Moda Bake Shop recipe that will also feature Charm Packs! I won't show you the whole thing, but here's a little sneak peek.


You can also search Moda Bake Shop for all recipes featuring Charm Packs!

Monday, November 22, 2010

Another Bake Shop Recipe! Lily & Will Log Cabin Baby Blocks!

Be sure to hop on over to the Moda Bake Shop today! I have a special recipe featured!


I made these using Bunny Hill Designs' Lily & Will line, with just 2 charm packs!

You may recognize that these log cabin "blocks" were based on my original Project Quilting Log Cabin block entry made with a Basic Grey Eva charm pack

!

Sunday, September 12, 2010

Quick blankie, Jump Rope Sew-Along and a fun suprise!

I wanted to share a quick little project I sewed yesterday! A friend's little girl was so sad to outgrow her very favorite dresses so I was happy to turn them into a special keepsake for her. I thought about what would be the best way to do it for a few days, and finally settled on a simple 4-triangle-panel design because I wanted to keep the ruffles all around the edges.

Here's the before:


And here's the after!  (Excuse the cruddy lighting on both - just phone pictures taken in a rush so the blankie would be ready for the little girl's birthday party.)


In other sewing news, I've been having fun with the Jump Rope Sew-Along at Sew Mama Sew! I decided to make 2 dresses, 1 for each of my girls, although I'm sure they'll both wear each since they they both measure the same size for this pattern! I've chosen a woven plaid for view A and the floral print I mentioned previously for view B! Here's a peek at both in progress (turn you head and pretend Blogger is not rotating for no reason).


And one last bit of fun - my little Strip-Pieced Pleated Skirt recipe was featured at We All Sew! Take a peek - there's a huge list of free project tutorials and several I'd like to try!

Sunday, August 29, 2010

Special coupon!

I've been so thrilled to see the positive responses to my little tutorials! I'm still making my way through the comments, so if you left a link I'll be visiting you soon if I haven't already. :)

I came across a lovely little skirt using my tutorial in the Moda Bake Shop Flickr group!

Botany skirt

Why don't you click over and leave maggistitches a nice comment! :)

It's been such fun to see the other blogs that have featured my skirt tutorial! One of those is Crafty Girls Workshop and they are even offering a special coupon to my readers to get 10% off your entire purchase from their shop with the code FQ10 . I've never purchased from this shop before, but I sure think it's nice of them to offer a coupon. :) You could use this discount to pick up an Origins jelly roll for yourself to make the same skirt I made or try a new version that is all your own!

Wednesday, August 18, 2010

My Moda Bake Shop debut & an applique pattern to share!

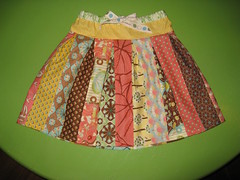
If you've been reading along for a while you may remember this little skirt and my promise to one day share the pattern. Well, that day is here!

I am so excited to share with you my Moda Bake Shop debut! Head over and take a look at my Strip-pieced Pleated Skirt tutorial! The tutorial was so long I decided not to focus on the coordinating t-shirt there, so that's a treat for you right here. :)


If you want to follow along and make a coordinating shirt, you'll need a t-shirt, fabric scraps, paper-backed fusible web, some sort of stabilizer (ideally water soluble), and coordinating thread.

The yellow t-shirt happened to be hanging in the closet - how perfect is that?  I knew I wanted to do an applique of some sort and when I sat down with the skirt and my drawing pad, this is what I came up with. (Scanned and rotated so it looked more balanced.) I wanted to mimic the flowers on a piece of fabric but also didn't want to exactly copy them. I'd planned a simple design, but I think my digiscrap side fought its way through and I ended up with a floral cluster!


I scanned my sketch in not just to show you all, but to create the pattern I used to cut out all the pieces. Here it is after a visit to Photoshop.
The next step is to choose the fabrics for each piece! I used the same Basic Grey Origins Jelly Roll as I did for the skirt, some of the same fabrics, and some other strips I hadn't used yet. I roughly cut out the paper pattern piece, then cut a small piece of fabric I could fit the pattern on, and attached paper backed fusible web to the wrong side of the fabric. Instead of tracing the pattern onto the paper backing I just held the pattern right on top and cut it out right along with the fabric!


After cutting, then place each little applique piece on to the fabric to lay out the final arrangement.


As you can see I didn't end up following my own pattern! Instead of layering the big flower's center I fussy cut it (same for the smaller flowers too). Also with the way I placed the pieces it still seemed a bit unbalanced, so I added in an extra leaf on the right.  Once you are happy with the placement, fuse in place according to the directions on your fusible web.

After fusing, it's time to sew! I've hand embroidered along the edges of fused appliques before, but I wanted something quicker for this project, so I used a 30 weight Sulky machine embroidery thread and a machine buttonhole stitch! Use a stabilizer on the underside to keep your stitches nice and smooth. A water soluble stabilizer would be ideal but I didn't have any and didn't feel like waiting, so I just forged ahead and used another sheet of graph paper. :) Worked nicely for keeping the fabric from getting pulled down into the feeddogs and kept the stitches even, but was a giant pain to remove at the end. Looked neat though!


For a nice clean finish, leave the beginning and ending thread tails an inch or two long, pull to the inside, and then knot and trim them. This will also help prevent the thread from coming undone.

I haven't yet, but I plan to fuse a lightweight knit interfacing inside the shirt to cover up the stitches and give it a softer feel.

Here's the finished shirt!


And if you'd like to use my little applique pattern, you can download it right HERE. Please note, this pattern is for personal use only, not for any commercial use including home-sewing for profit. (It would look really cute on a tote bag or a backpack too I think!)

If you do use it, I'd love to see your final result! Post a comment with a link to your photo or send me an email!

Monday, August 9, 2010

A little catching up!

I was so excited to learn I'd won the public vote in the Project Quilting Office Supply challenge! And in even more excitement I placed 2nd in the judges vote! WOW! I really do love how my little quilt turned out. It was worth those two almost sleepless nights I think!


I have been busily sewing the last few weeks, finishing more projects in a week that I think I every have before! BUT I can't show them all to you just yet. I will soon! I sewed up a few adorable samples that will be featured on the Above All Fabric blog this week, I sewed up a sample for a fun pattern Trish of Two Peas In A Pod Homegrown Designs will publish soon, and I'm working on my very first fully detailed sewing tutorial to be featured on a very exciting website later this month. (Super exciting!) And that's doesn't even cover everything!

And one more exciting bit of news, the MODKID Kyoko dress I sewed last Fall was featured in the Basic Grey August 2010 newsletter!  If you aren't subscribed to recieve them by email, you can download the newsletter pdf right on this page of the Basic Grey website.  Take a peek!

Thursday, July 8, 2010

Some Contest Results!

A big thank you to everyone who has put in their votes for me this week!

I was thrilled to win the public vote for my little log cabin cube over at Project Quilting!


And speaking of Project Quilting, I started sewing on my project for the current challenge, "Stars Over America," today! I'm using a foundation piecing pattern that I dreamed up years ago but never used and I love how it's turning out! Stay tuned for a process post of how I made it soon. :)

Sadly I didn't win the cheater quilt contest at Spoonflower, but I am pleased with the little quilt I designed and intend to order the panel for myself sometime!


And lastly, what you've been waiting for, the results of my own little contest! I promised I would give away some sort of prize even if I didn't win, so the winner will get her choice of a $10 coupon to go shopping for digital scrapbooking supplies at my Digitals store OR a custom fat quarter of her choice from my designs at Spoonflower! The winner is...


Congratulations Aubrey! I'll be emailing you shortly to find out your pick! :)


Also, a little reminder! I would really, really, really love to make it to the finalist round! They are taking public votes all month long and while the judges will pick the 15 finalists, lots of public votes (and comments!) would certainly get their attention. :) You can vote HERE daily!