A big thank you to everyone who has put in their votes for me this week!
I was thrilled to win the public vote for my little log cabin cube over at Project Quilting!
And speaking of Project Quilting, I started sewing on my project for the current challenge, "Stars Over America," today! I'm using a foundation piecing pattern that I dreamed up years ago but never used and I love how it's turning out! Stay tuned for a process post of how I made it soon. :)
Sadly I didn't win the cheater quilt contest at Spoonflower, but I am pleased with the little quilt I designed and intend to order the panel for myself sometime!
And lastly, what you've been waiting for, the results of my own little contest! I promised I would give away some sort of prize even if I didn't win, so the winner will get her choice of a $10 coupon to go shopping for digital scrapbooking supplies at my Digitals store OR a custom fat quarter of her choice from my designs at Spoonflower! The winner is...
Congratulations Aubrey! I'll be emailing you shortly to find out your pick! :)
Also, a little reminder! I would really, really, really love to make it to the finalist round! They are taking public votes all month long and while the judges will pick the 15 finalists, lots of public votes (and comments!) would certainly get their attention. :) You can vote HERE daily!
Thursday, July 8, 2010
Thursday, July 1, 2010
The week & month of contests!
Remember the post from a couple weeks ago about the quilt that cost me the edge of my fingertip? Well, injured finger or not, I was determined to get that little quilt done so I could enter it into McCall's Quilt Design Star contest! Here's the finished quilt!
I would really, really, really love to make it to the finalist round! They are taking public votes all month long and while the judges will pick the 15 finalists, lots of public votes would certainly get their attention. :) You can vote HERE daily!
Here is a close up of the same quilt. I've named it Windy Day Pinwheels and it will hang in my son's room. It uses many of the same fabrics as my girls' quilts!
I've collected so many fabrics for his quilt over his two years that I made it really scrappy, but here's a peek at my color placement sketch so you can see the pinwheel pattern a little better.
That's not the only fabric/quilt/contest news! I also created a “cheater quilt” panel with my "I *Heart* Daisies" designs for the current Spoonflower Fabric of the Week contest! I’d sure love to win and if I do, I’ll have a little giveaway! See the details below. (A cheater quilt is a panel of printed fabric that looks as if it was pieced with different fabrics.)
The quilt with the most votes will be announced on July 7th and if it’s mine, I’ll let random.org do some picking for me and choose one winner from this blog and one from my sewing blog! You are free to enter both and you have until the end of the day, July 6th ET to do it. :) The winner from each can choose between a $20 coupon to my Digitals store or 1 yard of your choice of fabric (on quilting cotton) from my Spoonflower store or any fabric based on a patterned paper in any of my digital scrapbook kits!
Here is how you can enter and get your name in a few times!
That’s it! Thanks for helping me out! :)
Also, remember to vote for me (Sarah B) or whoever your favorite entry is over at Project Quilting by Saturday!
(If I don't win at Spoonflower, I'll still have a little giveaway of some sort. :) I just haven't figured out what yet!)
I would really, really, really love to make it to the finalist round! They are taking public votes all month long and while the judges will pick the 15 finalists, lots of public votes would certainly get their attention. :) You can vote HERE daily!
Here is a close up of the same quilt. I've named it Windy Day Pinwheels and it will hang in my son's room. It uses many of the same fabrics as my girls' quilts!
I've collected so many fabrics for his quilt over his two years that I made it really scrappy, but here's a peek at my color placement sketch so you can see the pinwheel pattern a little better.
That's not the only fabric/quilt/contest news! I also created a “cheater quilt” panel with my "I *Heart* Daisies" designs for the current Spoonflower Fabric of the Week contest! I’d sure love to win and if I do, I’ll have a little giveaway! See the details below. (A cheater quilt is a panel of printed fabric that looks as if it was pieced with different fabrics.)
The quilt with the most votes will be announced on July 7th and if it’s mine, I’ll let random.org do some picking for me and choose one winner from this blog and one from my sewing blog! You are free to enter both and you have until the end of the day, July 6th ET to do it. :) The winner from each can choose between a $20 coupon to my Digitals store or 1 yard of your choice of fabric (on quilting cotton) from my Spoonflower store or any fabric based on a patterned paper in any of my digital scrapbook kits!
Here is how you can enter and get your name in a few times!
- Post a comment below letting me know you voted!
- Become a follower of this blog and leave a separate comment letting me know you did (or if you already are).
- Tweet a link to this blog post and leave a separate comment with a link to your tweet!
That’s it! Thanks for helping me out! :)
Also, remember to vote for me (Sarah B) or whoever your favorite entry is over at Project Quilting by Saturday!
(If I don't win at Spoonflower, I'll still have a little giveaway of some sort. :) I just haven't figured out what yet!)
Sunday, June 27, 2010
My first venture into Project Quilting!
I heard about Project Quilting a while back before it started, but didn't have time to join in the 1st challenge and somehow forgot all about it until last week! When I saw the 4th challenge posted last Sunday, I just couldn't get it out of my head, so when I came up with this idea, I knew it was time to jump in!
The theme for Challenge 4 was the log cabin block and the challenge was that the back of at least one fabric had to be included. (See the challenge post for all the rules.) The motto for Project Quilting is "Think outside the square," so that in combination with the log cabin block made me think about an actual block, a cube!
I went hunting in my stash for fabric that I not only loved the right side of, but the wrong side to. When I saw the Moda charm pack of the Basic Grey Eva line I knew that was it! To start, I separated the charm squares out into 6 groups, one for each side. I initially thought I'd use 6 fabrics per side, but ended up using just 5, so I pulled 1 square out of each of these stacks once I started cutting (all the textured solid prints and 1 or 2 patterned prints). See how nice the back of the fabrics are too? Visibly different, but still beautiful!
With only a 5" square of each to work with, I knew the pieced had to be tiny! The center finished to 1" square, and the strips just 1/2".
Here's a little mock up of one of the blocks! I used the right side of the fabric in the center and on the top and left of each little quilt block and the wrong side of the fabric on the right and bottom. I guess I should have put the wrong side on the left and the right on the right, huh? :)
The little blocks all came together really quickly! Here are all 6 unquilted blocks along with the batting and muslin backing for each.
I machine quilted each block in a square spiral pattern. I used a greyish-taupe thread for the 2 dark blocks and white for the 4 lighter blocks.
Assembly time! I made 2 3-block strips. Now picture folding each strip into a C shape and fitting those together --- it makes a block!
With a single seam I sewed the blocks together, leaving the last edge open for turning and stuffing.
And just like that, I went from 6 flat little quilts into a 3-dimensional quilted block!
After turning, stuffing and hand stitching the opening closed, I was done!
I had planned to use this as a pincushion right beside my machine, but I love it so much I don't know if I will! Right now I have it placed where can see it while I'm working!
Be sure to head over to Project Quilting and VOTE for your favorite entry! Of course I'd love to win, but be sure to admire all the amazing entries and pick your favorite! One lucky voter will win a prize too -- vote on the left sidebar and read down through to the end to see how to enter!
The theme for Challenge 4 was the log cabin block and the challenge was that the back of at least one fabric had to be included. (See the challenge post for all the rules.) The motto for Project Quilting is "Think outside the square," so that in combination with the log cabin block made me think about an actual block, a cube!
I went hunting in my stash for fabric that I not only loved the right side of, but the wrong side to. When I saw the Moda charm pack of the Basic Grey Eva line I knew that was it! To start, I separated the charm squares out into 6 groups, one for each side. I initially thought I'd use 6 fabrics per side, but ended up using just 5, so I pulled 1 square out of each of these stacks once I started cutting (all the textured solid prints and 1 or 2 patterned prints). See how nice the back of the fabrics are too? Visibly different, but still beautiful!
With only a 5" square of each to work with, I knew the pieced had to be tiny! The center finished to 1" square, and the strips just 1/2".
Here's a little mock up of one of the blocks! I used the right side of the fabric in the center and on the top and left of each little quilt block and the wrong side of the fabric on the right and bottom. I guess I should have put the wrong side on the left and the right on the right, huh? :)
The little blocks all came together really quickly! Here are all 6 unquilted blocks along with the batting and muslin backing for each.
I machine quilted each block in a square spiral pattern. I used a greyish-taupe thread for the 2 dark blocks and white for the 4 lighter blocks.
Assembly time! I made 2 3-block strips. Now picture folding each strip into a C shape and fitting those together --- it makes a block!
With a single seam I sewed the blocks together, leaving the last edge open for turning and stuffing.
And just like that, I went from 6 flat little quilts into a 3-dimensional quilted block!
After turning, stuffing and hand stitching the opening closed, I was done!
I had planned to use this as a pincushion right beside my machine, but I love it so much I don't know if I will! Right now I have it placed where can see it while I'm working!
Be sure to head over to Project Quilting and VOTE for your favorite entry! Of course I'd love to win, but be sure to admire all the amazing entries and pick your favorite! One lucky voter will win a prize too -- vote on the left sidebar and read down through to the end to see how to enter!
Tuesday, June 15, 2010
New project & the risky hobby of quilting!
In the last few weeks I whipped up a quilt little quilt project, my quickest ever I think, but I just sent it off to be machine quilted, so I'll hold off on pictures (and maybe even a pattern & tutorial) until I get it back! :)
I immediately jumped into a brand new project, starting with a graph paper sketch this past weekend! I sketched it out on Saturday and pulled and cut all the fabric on Sunday! The fabrics are all from my stash -- fabrics I've been collecting over the last two and a half years for my little boy's quilt(s)!
I am terribly excited about the quilt design but I'm going to hold off on sharing it with you for a little bit! ;)
Here's a peek at the pieces all cut and ready to sew...
and here's a peek after I chain pieced all 96 half square triangle units together yesterday!
Next step, trimming down and squaring up all the half-square triangle units. A necessary step, but not my favorite. Just as I started to settle into it my little guy decided he wanted to help out! He carefully placed the ruler right on the squares. (The rotary cutter wasn't near him here.)
Unfortunately, shortly after I took this picture last night and the little guy got settled for bed, I wasn't so careful with the rotary cutter and ended up slicing off part of my finger! No blood on the fabric at least, but I haven't worked up the nerve to touch the rotary cutter again and I've got a big bandage on my sad, sore disfigured finger. I desperately want to get back to work on the quilt though, so maybe when there's some supervision around for *me* tonight I will brave it.
I immediately jumped into a brand new project, starting with a graph paper sketch this past weekend! I sketched it out on Saturday and pulled and cut all the fabric on Sunday! The fabrics are all from my stash -- fabrics I've been collecting over the last two and a half years for my little boy's quilt(s)!
I am terribly excited about the quilt design but I'm going to hold off on sharing it with you for a little bit! ;)
Here's a peek at the pieces all cut and ready to sew...
and here's a peek after I chain pieced all 96 half square triangle units together yesterday!
Next step, trimming down and squaring up all the half-square triangle units. A necessary step, but not my favorite. Just as I started to settle into it my little guy decided he wanted to help out! He carefully placed the ruler right on the squares. (The rotary cutter wasn't near him here.)
Unfortunately, shortly after I took this picture last night and the little guy got settled for bed, I wasn't so careful with the rotary cutter and ended up slicing off part of my finger! No blood on the fabric at least, but I haven't worked up the nerve to touch the rotary cutter again and I've got a big bandage on my sad, sore disfigured finger. I desperately want to get back to work on the quilt though, so maybe when there's some supervision around for *me* tonight I will brave it.
Tuesday, June 8, 2010
Another giveaway you'll want to enter!
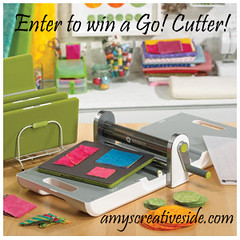
Amy of Amy's Creative Side is having a giveaway of an AccuQuilt Go! Cutter!

How handy would this machine be for quickly cutting your quilt pieces? Perfect angles and measurements every time! Much better than my current cutting method: sitting on the wood floor with my rotary cutter and self-healing mat.

How handy would this machine be for quickly cutting your quilt pieces? Perfect angles and measurements every time! Much better than my current cutting method: sitting on the wood floor with my rotary cutter and self-healing mat.
Thursday, June 3, 2010
I was the lucky winner!
I was so surprised to learn that I won the giveaway on The Creative Connection blog for some of Patty Young's new knits and her two new MODKID knit patterns! They arrived this week and I'm so excited to get sewing! These knits aren't even available in stores yet!
Here's a peek at the knits I received. (Complete with a handwritten note from the fabulous Patty Young herself!)
Here's a closer look at the two patterns. You can pick them directly from the MODKIDBOUTIQUE or from an online fabric store such as Above All Fabric.
Very fortunately for me, my girls each had a different favorite of the knit prints, so my first venture into the world of sewing with knits will be 2 Abigail dresses. :) I'll be sure to share the results and maybe even the process if I remember to take photos along the way!
Here's a peek at the knits I received. (Complete with a handwritten note from the fabulous Patty Young herself!)
Here's a closer look at the two patterns. You can pick them directly from the MODKIDBOUTIQUE or from an online fabric store such as Above All Fabric.
Very fortunately for me, my girls each had a different favorite of the knit prints, so my first venture into the world of sewing with knits will be 2 Abigail dresses. :) I'll be sure to share the results and maybe even the process if I remember to take photos along the way!
Tuesday, June 1, 2010
Take a peek at this giveaway!
Jennifer of Sugar Stitches is having a fabulous giveaway! She's got a big stack of Heather Ross fabrics, and she's going to give some away to one or two lucky folks who leave a comment on her blog post, so hurry over and post right HERE!
Sunday, May 23, 2010
Madison Bag!
I showed you the cute Patsy Ann Apron Top by Two Peas in a Pod Designs not long ago, but also I had the wonderful pleasure of testing her Madison Bag pattern! The Madison Bag pattern will be up for sale in her etsy shop at http://twopeasinapoddesigns.etsy.com in a few weeks!
I knew I wanted to make a bag with the big Splashy Rose fabric from Sandi Henderson's Meadowsweet (this is the Persimmon) and when I saw the Madison Bag pattern, I thought the curved shape would highlight the roses perfectly! I also chose two other Meadowsweet fabrics, the Melon Henna Garden and the Blush Poppy Parade. I used the Poppy Parade for the inset strip (look how perfectly it fit!) and for the inside pocket. I used the Henna Garden for the lining and the strap.
Here's the back view of my Madison Bag. I made it just like the front because the Splashy Rose print is so bold, but the pattern suggests using four different fat quarters for a patchwork look.
The flap has a magnetic snap closure. I'd never installed one before so I was a bit nervous, but it really was easy and I think gives such a professional finish!
Here's a picture of the inside of the bag. It's proved to be just the right size for me! I can carry all my everyday items plus I've taken to carrying the diaper bag essentials as well, which really isn't usually a diaper, but my son's Epi-Pens, a little bottle of antihistamine, and some of his special cookies.
I'd intended just to use this bag for special occasions, but since I finished it a few weeks ago, I haven't had the heart to stop carrying it! I'm sure you'll love making your own, so be sure to keep an eye on Two Peas in a Pod Designs to find out when it's released!
I knew I wanted to make a bag with the big Splashy Rose fabric from Sandi Henderson's Meadowsweet (this is the Persimmon) and when I saw the Madison Bag pattern, I thought the curved shape would highlight the roses perfectly! I also chose two other Meadowsweet fabrics, the Melon Henna Garden and the Blush Poppy Parade. I used the Poppy Parade for the inset strip (look how perfectly it fit!) and for the inside pocket. I used the Henna Garden for the lining and the strap.
Here's the back view of my Madison Bag. I made it just like the front because the Splashy Rose print is so bold, but the pattern suggests using four different fat quarters for a patchwork look.
The flap has a magnetic snap closure. I'd never installed one before so I was a bit nervous, but it really was easy and I think gives such a professional finish!
Here's a picture of the inside of the bag. It's proved to be just the right size for me! I can carry all my everyday items plus I've taken to carrying the diaper bag essentials as well, which really isn't usually a diaper, but my son's Epi-Pens, a little bottle of antihistamine, and some of his special cookies.
I'd intended just to use this bag for special occasions, but since I finished it a few weeks ago, I haven't had the heart to stop carrying it! I'm sure you'll love making your own, so be sure to keep an eye on Two Peas in a Pod Designs to find out when it's released!
Friday, May 21, 2010
"Strawberry Shortcake Princess" dress
AKA the Kindergarten graduation dress
With the big graduation ceremony looming, I'd thought I would try to find a quick pattern and whip up a simple summery dress. My daughter had other ideas. :) This past Monday she informed me that she did not want the one I'd planned, she really wanted a dress with *this* fabric, Sandi Henderson's Pink Strawberry Fields from the Meadowsweet line.
Tuesday morning I headed out for a pattern, found McCalls M5793 and just knew she would love it. I grabbed some light pink Kona cotton for the lining (it's completely lined so the netting/tulle doesn't feel scratchy and the seams are all finished and hidden. It's called an easy pattern, and while it wasn't terribly difficult, I certainly wouldn't hand it to a beginner. Finishes very nicely though!
The pattern calls for "soft netting" but the store I went to only had a netting with big holes that I didn't even consider and a "tulle" and "sparkle tulle" with smaller holes. So, I picked up the lime green sparkle tulle and headed to the counter. The pattern called for 3-1/4 yards of 72" soft netting but the kind I picked up was about 45" so I just bought 7 yards of it. Eeek! I think that worked out to about the right length, as over the top as it sounds. Instead of piecing end-to-end strips of it as the pattern called for, it ended up being the same finished dimensions to cut the full length of the tulle down the middle and then piece those two giant 21' strips together. Then those fold in half longways and gather up a huge amount. I spent far more time wrangling tulle than anything else.
I had a whopper of a migraine Tuesday, but late at night I managed to cut out the strawberry fabric and the lining (same pieces for both, so quick). Wednesday morning I got the lined bodice done and the skirt and lining pieced and started in on the tulle. I got more than half of it attached to the skirt lining that afternoon and only broke 3 machine needles. (Don't even try to use a ruffler foot on tulle. It's not pretty.) I didn't get back to it until Thursday morning, but got the rest of the tulle attached and the skirt onto the bodice by the time to pick up my girls from half day kinder & preschool. The afternoon was devoted to inserting the zipper (broke another needle) and hemming. Whew!
I'd say the work was well worth it. :)
I didn't have time to do it before the graduation ceremony (I was hand stitching the lining onto the zipper 30 minutes before we had to go) but I intend to add a few tack stitches to attach the ribbon in place on the sides. The dress is still a bit big for her and the ribbon kept riding up from the dress waistline.
With the big graduation ceremony looming, I'd thought I would try to find a quick pattern and whip up a simple summery dress. My daughter had other ideas. :) This past Monday she informed me that she did not want the one I'd planned, she really wanted a dress with *this* fabric, Sandi Henderson's Pink Strawberry Fields from the Meadowsweet line.
Tuesday morning I headed out for a pattern, found McCalls M5793 and just knew she would love it. I grabbed some light pink Kona cotton for the lining (it's completely lined so the netting/tulle doesn't feel scratchy and the seams are all finished and hidden. It's called an easy pattern, and while it wasn't terribly difficult, I certainly wouldn't hand it to a beginner. Finishes very nicely though!
The pattern calls for "soft netting" but the store I went to only had a netting with big holes that I didn't even consider and a "tulle" and "sparkle tulle" with smaller holes. So, I picked up the lime green sparkle tulle and headed to the counter. The pattern called for 3-1/4 yards of 72" soft netting but the kind I picked up was about 45" so I just bought 7 yards of it. Eeek! I think that worked out to about the right length, as over the top as it sounds. Instead of piecing end-to-end strips of it as the pattern called for, it ended up being the same finished dimensions to cut the full length of the tulle down the middle and then piece those two giant 21' strips together. Then those fold in half longways and gather up a huge amount. I spent far more time wrangling tulle than anything else.
I had a whopper of a migraine Tuesday, but late at night I managed to cut out the strawberry fabric and the lining (same pieces for both, so quick). Wednesday morning I got the lined bodice done and the skirt and lining pieced and started in on the tulle. I got more than half of it attached to the skirt lining that afternoon and only broke 3 machine needles. (Don't even try to use a ruffler foot on tulle. It's not pretty.) I didn't get back to it until Thursday morning, but got the rest of the tulle attached and the skirt onto the bodice by the time to pick up my girls from half day kinder & preschool. The afternoon was devoted to inserting the zipper (broke another needle) and hemming. Whew!
I'd say the work was well worth it. :)
I didn't have time to do it before the graduation ceremony (I was hand stitching the lining onto the zipper 30 minutes before we had to go) but I intend to add a few tack stitches to attach the ribbon in place on the sides. The dress is still a bit big for her and the ribbon kept riding up from the dress waistline.
Blogger's Quilt Festival - Spring 2010
I had such a nice time on the Blogger's Quilt Festival last year that I had to participate again this year!

The quilt I'd like to share today is the one I made for my younger daughter. Since she and my older daughter share a room, I wanted their quilts to coordinate but have their own personality. They share many of the same fabrics. (If you peek back to last year's post you'll see my older daughter's quilt.) Here it is!
I finished piecing the top before my daughter was born but I think it took a full year before I decided what to use for a border, and then it sat for a good long while again. My mom took it to one of her longarm quilter friends who did a fabulous job with it, and then my mom sewed the binding on, because who knows when I'd have ever finally done it. :)
I always wanted to make a Lone Star quilt but the angles and bias edges scared me. When I saw the Quiltsmart system I knew I would use it for my Maddie's quilt. It was so easy and really took the worry out of it!
I used the same "Floral Bouquet" by Ladyfingers Studio for Andover Fabrics as on the other quilt and since I had (and still do have!) such a stock of it, I even backed the quilt in it. Still love it!

This is Age of Innocence by Sharlene Jorgenson for Bernatex. I have a large stock of this one too! I was very concerned about making sure I kept all of this fabric with the lines vertically, so carefully planned the cutting of the background pieces.
The rosy pink rose fabric is from the "Sentimental Journey" line by Robyn Pandolph. The cranberry and the green are my mystery fabrics. I have no idea who they are by! The green was also in my oldest's quilt, but the cranberry is the only all new addition.
Thanks for stopping by! I'm looking forward to seeing the other beautiful quilts throughout the Blogger's Quilt Festival!

The quilt I'd like to share today is the one I made for my younger daughter. Since she and my older daughter share a room, I wanted their quilts to coordinate but have their own personality. They share many of the same fabrics. (If you peek back to last year's post you'll see my older daughter's quilt.) Here it is!
I finished piecing the top before my daughter was born but I think it took a full year before I decided what to use for a border, and then it sat for a good long while again. My mom took it to one of her longarm quilter friends who did a fabulous job with it, and then my mom sewed the binding on, because who knows when I'd have ever finally done it. :)
I always wanted to make a Lone Star quilt but the angles and bias edges scared me. When I saw the Quiltsmart system I knew I would use it for my Maddie's quilt. It was so easy and really took the worry out of it!
I used the same "Floral Bouquet" by Ladyfingers Studio for Andover Fabrics as on the other quilt and since I had (and still do have!) such a stock of it, I even backed the quilt in it. Still love it!

This is Age of Innocence by Sharlene Jorgenson for Bernatex. I have a large stock of this one too! I was very concerned about making sure I kept all of this fabric with the lines vertically, so carefully planned the cutting of the background pieces.
The rosy pink rose fabric is from the "Sentimental Journey" line by Robyn Pandolph. The cranberry and the green are my mystery fabrics. I have no idea who they are by! The green was also in my oldest's quilt, but the cranberry is the only all new addition.
Thanks for stopping by! I'm looking forward to seeing the other beautiful quilts throughout the Blogger's Quilt Festival!
Subscribe to:
Posts (Atom)